- This article is available in the following languages:
-

-

-

-

-

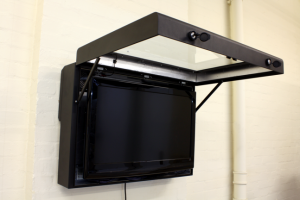
For companies new to digital signage, the process of trying to install a new advertising system can seem like a technological hurdle. The reality however, is that an outdoor digital signage enclosure can be very simple to install, and with a basic start-up system like the one below, almost everybody can get involved.
When Armagard ships an enclosure, it’s supplied with a simple instruction manual that guides customers through ‘how to mount’ their LCD enclosure and display. However, the decision of what type of signage to use is down to the customer. This benefits the customer by allowing them to upgrade when they want, and not locking them into restrictive packages; and too choose a setup that suits their application, content and budget.
So for those not knowing where to start, we’ll run through the necessary steps on how to get started with digital signage, using clear and precise instructions that will leave users prepared for any future outdoor advertising plans.
Note – A straightforward combination of an LCD screen and a standalone media player is being used for the example below. Other methods of digital signage are also available.
1. In order for digital signage to work, some form of display content needs to be produced. This content, which could consist of videos, images and audio, is a key part of engaging customers and needs to be accurately targeted to achieve planned objectives or a call to action.
2. At this point we advise testing your content, to make sure that everything plays correctly and to avoid any unexpected problems later on.
3. With the prepared marketing content, transfer the files to a removable memory device, making sure the files are arranged in the order they’re required to play, and that you have backups to work from if they get deleted.
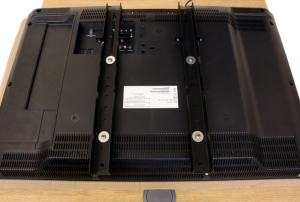
4. At this point the LED/LCD display must have its vertical bracket arms attached to the back (these steps are covered in depth in our instruction manual).
5. Once secure, the levelling of the display must be tested by placing it onto the enclosures interior bracket and making sure it’s not lopsided. If ok, the display can then be placed to one side, but if adjustment is required, then remove, amend, and test again until level.
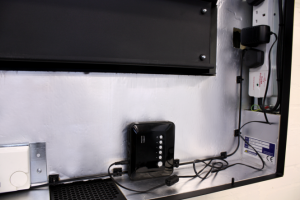
6. With the display ready, decide where to place the media player, making sure the power cable can reach once plugged in.
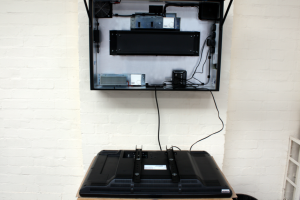
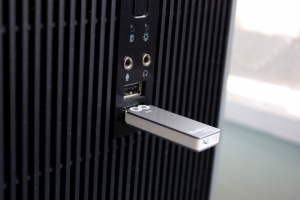
7. Plug in the leads for the display and media player into the surge protector, along with the USB stick for the media player.
8. Carefully place the display into the enclosure, making sure any cables are tidies behind the enclosure and out of sight.
9. With the enclosure door still open, turn on the mains power and configure your TV and media player to start displaying content.
Note – At this point any fans and additional hardware will start working to their pre-sets.
10. Depending on what type of media player you have, add any additional effects to the chosen content via the players interface options and finalise your playlist for customer viewing.
Note – If you are using an advanced media player, it’s probably worth spending some additional time and discovering all the display options open to you; this will go to helping with overall presentation.
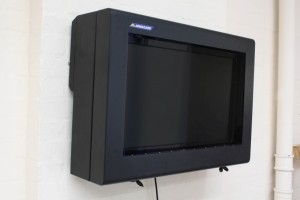
11. Finally, close the enclosure door and make sure the remote control has a clear line of sight through the window to the media player and test setup. Adjust if necessary.
And that’s it, your digital signage enclosure is ready for action. Based on the parameters you set the enclosure will now protect your digital signage against outdoor weather, extreme temperatures and any vandal attacks.


